
Back-to-School Restaurant Refresh: 10 Practical Checks (2026)
A practical two-height family-dining audit covering the real service daypart, child-height sightlines, tabletop stability, routes, lighting and reset work.

By Kamrul Hasan Rayhan · Published 3 August 2026 · Last updated 3 August 2026
If the school calendar shifts your weekday family peak earlier, the room may be serving more children while daylight is fading. That changes the useful lighting scene, stroller and high-chair routes, tabletop risk, and what is visible from a booth.
Use this as a two-height audit before the first busy school week. Compare the adult view with the child view, watch one live early service, then fix the smallest layer that creates the problem. Confirm prices, stock, and delivery directly with suppliers; search-interest data does not establish any of them.
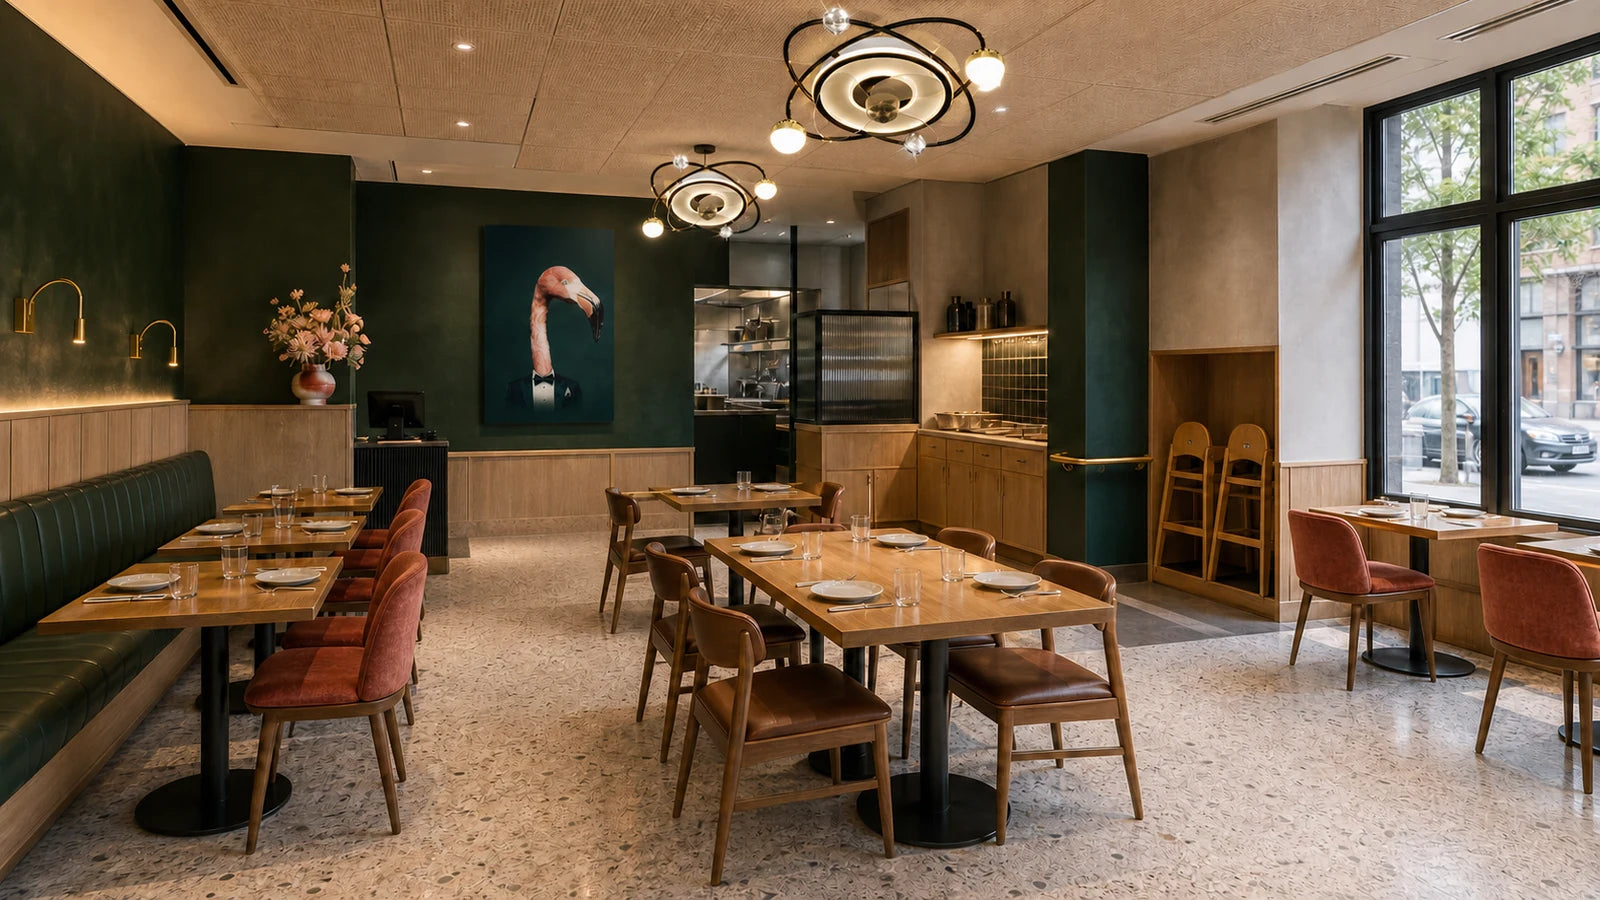
The 10 ideas at a glance
- Rebuild the light for a 5 p.m. peak, not an 8 p.m. one.
- Test table lamps where the audit finds a gap.
- Brighten the family zone without going cafeteria.
- Check the room at kid height — and fix the band you find.
- Swap summer brights for early-autumn textiles.
- Rotate the wall program for the new term.
- Fix the booth and banquette wall at seated eye level.
- Make the centrepiece survive a seven-year-old.
- Reset the entry and host stand for the school-year first impression.
- Build one photographed corner families will actually use.
Each check answers one of three possible changes: an earlier peak, more family covers, or less daylight during service. Confirm that the change is real in your own covers and room before buying anything. The underlying room method — zoning, circulation and table layout — is in our family restaurant dining room design guide. The general changeover is covered in our September decor swap plan.
1. Rebuild the light for a 5 p.m. peak, not an 8 p.m. one
Start with evidence: compare hourly covers for the first school weeks with the preceding weeks, then observe how daylight changes during that busier window. If the room already works, document the existing scene and leave it alone.
If it does not, name the useful states and give each an owner on the pre-shift sheet. A simple set might be daylight service, early family service and late evening. Those are operating labels, not prescribed light levels. Record the dimmer positions that work, and verify the result at occupied tables rather than from the pass.
The middle state should let guests read the menu and see faces and food comfortably without creating glare. Measure representative tables with a light meter, note dark or over-bright seats, and correct the specific problem. The restaurant foot-candle field guide explains how to make a repeatable reading; the numbers are a diagnostic record, not a universal design target.
Use the controls and fixtures already installed where possible. Any new hardwired fixture, control or ceiling fan belongs with a qualified professional and the applicable electrical, building and fire requirements. The daypart method is in our restaurant mood lighting guide.
2. Test table lamps where the audit finds a gap
A portable table lamp can help a table that becomes dim as daylight falls, but it should solve an observed problem rather than become a compulsory object on every top.
Pilot one model on the darkest tables through a full service. Check stability, glare from every seat, usable runtime at the chosen setting, cleanability, charging instructions and whether the base takes space needed for plates, high-chair placement or shared dishes. Use only products whose supplier documentation fits the intended commercial setting.
If the pilot works, treat the lamps as a managed fleet. Write a charge location, deployment time, end-of-shift count and out-of-service rule. Set the par from the number of tables that need them plus the rotation observed during the pilot; do not assume one lamp per table.
Log any lamp that fails to complete the intended service window, then follow the maker's battery and disposal instructions. Selection and fleet planning are in our rechargeable restaurant table lamps guide; browse table lamps.
3. Brighten the family zone without going cafeteria
Turning up the whole room can solve one dark table while creating glare somewhere else. Diagnose the zone before changing it.
At representative seats, record menu readability, faces, reflected glare and the light-meter reading. Then test one change at a time: a different dimmer scene, aiming an adjustable fixture, shielding a visible source or adding a suitable layer. Lumens alone do not describe distribution or glare.
Wall lighting may help a dark perimeter, but only after checking mounting position, projection into circulation, controls and the wall finish it illuminates. A sample or temporary mock-up is more useful than choosing from a fixture photograph.
Do the check at the seats, not from the pass. Sit in the booth at 5:30 with the family state running and look at the person opposite — if you are squinting or they are backlit, you have a placement problem rather than a level problem. Bright & Social is the mood reference for this zone; browse wall lights.
4. Check the room at kid height
Adult standing height can hide problems that are obvious from a child's seat.
Use the actual seat or booster arrangement your venue provides and photograph the view with the table set for service. Look first for hazards and friction: glare, a bright source in direct view, reachable décor, sharp edges, trailing cables, unstable objects, blocked sightlines and a high chair that narrows the route.
Fix those issues before adding visual interest. Wall art should stay secure and out of impact or grab zones; tabletop objects should not reduce usable space or create a breakage, ingestion or sanitation problem. Check the same view from the accompanying adult's seat and the server's approach.
Photograph the corrected setup from both heights and keep the pair in the operations log. Mounting and projection checks are in our wall art size and height guide.

5. Test an early-autumn textile set
Textiles can change a large part of the view without changing furniture, but the right choice depends on the service and laundry system.
Make a sample table in the room. Check colour under every operating light state, drape at seated knees, movement when guests stand, snag risk, laundering instructions and how a real service stain releases. Decorative tassels or loose edges are a poor trade if they catch on chairs or slow the reset.
Build the par from the number used per service, laundry turnaround, reserve stock and documented loss rate. Record the exact size and supplier colour so a replacement is not guessed later. The September swap plan covers storage and labelling; our restaurant table decor guide covers tabletop composition.
6. Rotate the wall program for the new term
If a seasonal wall rotation suits the brand, reuse the mounting plan instead of inventing a new one each term.
Start with an elevation showing each existing anchor, frame size, clearance and asset ID. Shortlist replacement art to those constraints, then test one piece in the room. If the existing anchors are not rated or the substrate is unknown, stop and have the fixing assessed rather than reusing it by assumption.
Write the changeover as a schedule with an owner, access equipment, installation check and storage location. Wrap and label the outgoing pieces with the wall position and condition so the next rotation starts with usable information.
Review the sample during the service lighting state, from the tables that face it. That catches reflections, poor contrast and weak visibility before the full set is ordered.
7. Fix the booth and banquette wall at seated eye level
The wall above a booth is visually prominent and exposed to more contact than a distant feature wall.
Photograph the full banquette run, measure it and mark seat divisions, wall services and any area exposed to heads, bags or trays. Compare a single piece, a pair and a sequence on a scaled elevation before choosing metal wall decor or canvas art.
Mock up the outline with removable low-tack paper and inspect it from a seated adult position, the child-height audit position and the server route. Keep it outside head and tray paths. Also check wall-mounted objects against the protrusion and circulation provisions that apply to the site; the US baseline is the 2010 ADA Standards.
Fixings matter more here than anywhere else in a family room, because this is the wall that gets leant on, bumped and grabbed. The seating logic underneath is in our banquette seating design guide.
8. Stability-test the centrepiece
A centrepiece that is attractive in a product image can still be unsuitable on a working family table.
Test the complete assembly, not just the empty vessel. It should remain stable during a realistic table bump, preserve sightlines between seats, leave enough usable surface, contain no loose small parts, and tolerate the approved cleaning process. Material names alone do not prove those qualities: glass, ceramic, metal and resin products vary widely in weight, geometry, breakage behavior and finish.
Compare fresh and artificial arrangements with your own numbers. Include purchase or service cost, setup labour, cleaning, storage, replacement and disposal. Artificial stems still accumulate soil and wear; fresh material still needs a defined handling and replacement routine.
If a reusable vessel wins the test, assign it an asset ID and store the approved stem recipe with a photograph. Scale and placement are in our restaurant floral arrangements guide.
9. Reset the entry and host stand for the school-year first impression
The entry audit should answer a practical question: can a first-time family find the door, host point and accessible route without navigating décor or outdated signs?
Remove expired offers and duplicate signs. Then walk the arrival with the door open and closed, with the queue at its normal peak. Any arrangement at the host stand must preserve staff sightlines, counter workspace, egress and the accessible route. Stability-test it as carefully as a table object.
Observe the arrival during the actual service window as daylight changes. Check whether faces, door hardware, steps and wayfinding remain visible without glare. Escalate exterior, step, emergency or hardwired lighting changes to the appropriate qualified professional; decorative portable light is not a substitute for required life-safety lighting.
Our restaurant entrance design guide and host stand design guide cover the arrival sequence in full.
10. Build one photographed corner families will actually use
A photo-friendly corner can be useful when it also works as a real seat or waiting area.
Choose a location that does not obstruct service, queuing or egress. Mock up the background with one artwork and the existing light, then take test photographs on several common phones during daylight and evening service. Look for backlighting, glare, faces in deep shadow and objects that appear to grow out of a person's head.
Test the frame with adults and children of different heights without publishing the test images. Keep any new wall fixture subject to the same electrical, mounting and circulation review as elsewhere. If the venue photographs guests, establish a clear consent and retention process, especially for images involving children.
After launch, record whether guests use it and whether it causes operational friction. Keep, adjust or remove it based on that observation rather than treating it as permanent by default.
Build the budget from the audit
Do not label moves “free” because they reuse stock. Staff time, access equipment, patching, cleaning, storage and the disruption window are still costs. Give every proposed change the same short worksheet:
- Problem observed: table, time and evidence.
- Proposed response: reuse, relocate, repair, sample or buy.
- Full cost: product, freight, tax, installation, labour, storage and expected replacement.
- Approval needed: owner, facilities, landlord, electrician, fire official or other local reviewer.
- Success check: what will be measured during the first service.
- Rollback: where the outgoing item is stored and how the original scene is restored.
This prevents a visible seasonal swap from hiding an expensive installation or reset burden. Supplier stock and delivery estimates should be confirmed when the order is ready; generic seasonal lead times are not reliable enough for a venue plan.
The school-year kit
One shoppable block, in the order you will use it.
Light first. Pilot rechargeable touch table lamps only on tables where the audit found a gap. Review existing pendant lights, controls and wall lights with a qualified professional before proposing permanent changes.
Then the table. Sample textiles against the laundry and reset routine. Stability-test any vessel and complete arrangement; keep décor out of the usable place-setting area and away from child grab zones.
Then the walls and arrival. Shortlist canvas pieces or metal wall decor against a measured elevation. Mock up entry arrangements at full size and check sightlines, circulation and egress before ordering.
Start with Bright & Social for the family-zone reference, Warm & Intimate for the later scene and restaurant lighting for the full range. See the concept at The Fanfare Family Dining Room and The Orchard Breakfast Room. Resetting several sites at once? Trade projects.
Back-to-school restaurant decor FAQ
How do restaurants attract families during the school year?
Start with the actual early-service journey: a clear entrance, a staffed host point, an unobstructed route for high chairs or strollers, readable menus and a light scene that works as daylight changes. Promotions cannot compensate for friction in those basics.
What makes a restaurant kid-friendly?
Clear sightlines, stable table objects, cleanable surfaces and circulation that works with the venue's high-chair and stroller policy. Inspect reachable objects from the child's seat, then repeat the check from the adult seat and server route. Our family dining room guide covers the full method.
How do you decorate a family restaurant?
Use three controlled layers: fixed elements with documented mounts and approvals; a rotating layer with labelled storage; and a tabletop layer that has passed stability, space and cleaning checks. Audit all three from adult, child and server viewpoints.
What lighting is best for a family dining room?
There is no single best scene for every family room. Test menu readability, faces, food appearance, reflected glare and light levels at representative seats during the actual service window. Correct the failing zone and document the dimmer state. Our mood lighting guide covers the layering.
When should restaurants change their decor for fall?
Work backward from the relevant local school-calendar change and the supplier's current written lead time. Allow time for samples, approval, installation and a live-service test; do not rely on a universal August order date. The general version is our September decor swap plan.
Next in this series: the September decor swap plan for the general autumn changeover and the patio lighting audit if you still have seats outside.
Keep reading

guest-experience
Restaurant Restroom Cleaning Checklist and Inspection Log
Use this restaurant restroom cleaning checklist for opening, service inspections, supplies, fixtures, floors, waste, incidents, and closing records.

dining-room-operations
Restaurant Dining Room Cleaning Checklist: Turn to Close
Use this restaurant dining room cleaning checklist for table turns, high-touch points, spills, service stations, floors, opening, and close.

food-safety
Restaurant Kitchen Cleaning Checklist for Every Shift
Use this restaurant kitchen cleaning checklist to control opening, between-task, four-hour, closing, and weekly work without vague assignments.